Showing posts with label Easter. Show all posts

Thursday, April 3, 2014

Easter Eggs and Memory Albums

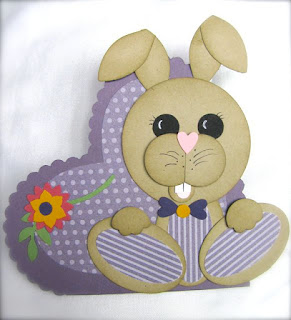
Look at me! I actually finished a project BEFORE the holiday! Feeling pretty good right now :) These little Easter Egg "thrones" are such fun to make with a few punches, stamps and the Big Shot!

So I don't have time to make a lengthy tutorial, so let me give you a few tips for making them:
  • Cadbury eggs are too small. I found some larger eggs at Costco (they are hollow)

  • Cut a 8.5"x2.5" strip from one end of your card stock and score it (down the long edges) at 1/2" and 2" (the Simply Scored board--item #122334--makes all your scoring SUPER SIMPLE). Then chop it up into 2"x 2.5" pieces and punch a hole using the 1-1/4" circle punch (#119861) in the middle like this----->>>>
     
  • Cut the rest of the card stock into 2"x8.5" strips. Score them at 3.5" and 5". Punch the ends with the Scallop Tag Topper Punch (133324). 
  • Line up the Designer Frame embossing folder (#123130) with the first score line from one end and run through the Big Shot --->>>>>

  • Punch the middle of the embossed frame out with the Large Oval Punch (#119859)

  • Adhere the "throne" piece between the two sides with SNAIL adhesive, add egg and embellish as desired! I used the flowers and punch from the Petite Petal bundle (#134821-wood or #134822-clear mount). As always, you can purchase these supplies from my Stampin' Up! store!

And in upcoming events, if you have a mother, friend or grad that you need a thoughtful gift for, come to my Mini Memory Album class! You can bring your own pictures or come to create the book and add photos later. The cost is $17 and you MUST bring your own Scissors, SNAIL adhesive and Glue Dots. If you forget your adhesive, I will let you buy new ones from me :) Please register below.


post signature

Friday, February 22, 2013

Easter Comes Early

As Easter is on March 31st this year (and it's just around the corner), I thought it would be fun to teach a Craft Camp to help prepare for Spring and the celebration of Easter! Here is one of the projects you'll be creating at the camp; A Spring Sampler!
Yes, it includes the frame! There are other projects we'll be making that day, and I'll try to share them over the next few weeks. As always, this will be at my home in Spanish Fork and space is limited, so register early (Paypal link below)!
Easter Craft Camp
Saturday, March 16
1 p.m.
$25
**Bring scissors and SNAIL adhesive** (need a refill? Let me know!)


Creative credit: I pulled ideas from many different places as I created this sampler (and even came up with a few of my own!), but would be remiss if I didn't give credit for the ribbon/doily to fellow demonstrator Kirsteen Gill's sampler here as it really makes this home decor project so beautiful!
post signature

Thursday, February 21, 2013

Hopping Down the Bunny Trail

My sweet friend Jan made me this card using Stampin' Up! framelits and punches...so adorable!


post signature

Tuesday, April 19, 2011

Baskets & Bunnies...Easter is on It's Way!

When I was demonstrating a cupcake gift at Helen's workshop last month, she suggested using the Perfect Setting Die and Big Shot to create an Easter Basket and I finally had a few minutes to try it out! The hardest part? Getting Smooch (the bunny) to slow down long enough to act as deliveryman!
I used the Scalloped Ribbon Border punch across the handle and added a few pearls and ribbons to dress it up. To create the bottom, I punched two scalloped circles (1 3/8"). On the first circle, cut into each scallop~just a smidge~and fold the edges up and push inside basket to create a "bottom" (adhere folded scallop edges to inside of basket with sticky strip) and then glue the second scallop circle to the bottom of the basket as a base.
 
I guess Easter is on it's way! The Easter Bunny visits our house on Saturday morning so that we can focus on the REAL meaning of Easter on Sunday:

What are some of your Easter traditions (spiritual or secular)? I'd love to read about your traditions in the comments!

Monday, April 11, 2011

Stamping Show and Tell

At the Stitched Stampers quarterly meeting last week, we had a "Shoebox Swap" and "Show-and-Tell" so today I'm sharing some of the really cute ideas. However, I'm saving one **unbelievably adorable idea** for my April workshops, so if you want to make the CUTEST little spring project, you should call me ASAP to book a party!!!

We'll start with Pam's card: This lovely monochromatic card displays the versatility of brown!
Sally's card is next: The tip she shared is to start with a 3"x3" square of White card stock and using the Dotted Scallop Ribbon Border punch, simply insert your card into the punch in the middle on all four sides, creating a perfect frame!
And to finish off today's fashion show, Hop the Easter Bunny presents some darling dotted Easter Milk Cartons in their stylish container, courtesy of Pam! (Hop had to be in the picture because those sweet little creatures showed up halfway through the swap, and they were the focus of attention from the moment they arrived!). I'll be happy to show you how to create these cute containers at YOUR party :)