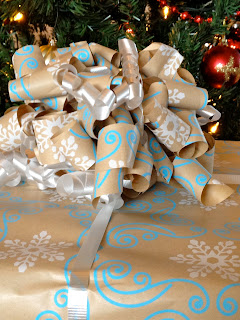
Years ago my mom started a wrapping paper business where she sold industrial-sized rolls of gift wrap, the metal cutters and oodles of ribbon. As a paper-addict, I was in heaven! Eventually I followed in her footsteps and worked the business for a while until I found Stampin' Up! Anywhooo...that's where I learned this lovely little technique to make a curled paper bow from your gift wrap:
Wrapping paper is super-easy to curl because it is light-weight paper, but I am teaching you the technique using SU! Designer Series Paper (Be Of Good Cheer~126896)
1. Start with a piece of wrapping paper or DSP. This is a 12x12 piece of DSP and you begin by folding it in half. If using a rectangle, fold it in half the long way, or "hot dog" fold. My favorite size is about 18" x 12" for a large package, but don't worry about the measurements...just grab a piece of paper from your printer and follow along!!
2. Take the open edge and fold it up toward the folded edge, leaving about 1" along the folded edge.
3. Cut from the bottom fold up toward the center fold, just through the open end edge, all the way across, about 3/4" to 1" wide. No need to measure, just start cutting :)
4. Once you are finished, unfold the whole paper and you will have "spider legs" on both sides with a fold down the middle, like this:
5. Now the fun begins! Use your scissors and "curl" the paper as you would a ribbon, with the pattern you want to show the most of on the opposite side of your scissors. As you are curling, you may pull off one of the "legs" (see the one in the background of the picture?) No worries: You will never notice it when it is finished!
6. When you are done curling, your paper or gift wrap will look like this:
7. If you are using gift wrap, just SCRUNCH it together up the middle fold to gather it. Using DSP (which is a little heavier) you may find it easier to fan fold it as you go along. The cuts you made make it pretty simple to do quickly. Again, this isn't rocket science, so you don't have to be exact, just fold it and go! Then grab an old bread twist tie (doesn't matter what color...mine is BLUE!) and wrap it around the gathers/folds and twist to secure.
8. Once your bow is secure, just mush it around until looks like a big fluffy bow and tape it to your gift and add a tag! This tag was stamped in Cherry Cobbler Ink (126966) with the Dec. 25 image from the Tags 'til Christmas stamp set (wood~120847 or clear~121169), punched with the Decorative Label Punch (120907) and adorned with Champagne Glass Glitter (120997), all of which can be ordered from my website


2 comments:
What a fun tutorial. I'm totally going to try it. Thanks for sharing.
Love this!! Thank you for the tutorial!! I'm totally gonna try this for our packages this year.
Post a Comment