Showing posts with label Boxes. Show all posts

Thursday, January 30, 2014

Love, Guaranteed

It's snowing again, so you need to do something to warm your heart...and the heart of the one you love! I've got just the exercise:
Heart-To-Heart Stamp Camp
Wednesday, February 5 at 7 p.m.
OR
Thursday, February 6 at 10 a.m.
Spanish Fork, UT

These three elegant projects will make you fall in love (with paper crafting) all over again:

You'll create a Valentine charger to decorate your home, a card and a box.  Here's the box up close:

The best news? It's only $10 for the class!! I set the price before I made the projects, so you are getting an AWESOME deal :)  While I provide almost all the supplies, you will need to bring Snail, Sticky Strip and scissors. If you need to order any adhesive, please let me know when registering. And registration is due by February 3rd (space is limited).


post signature

Thursday, October 17, 2013

Trick-or-Treat: A Perfect Fit for Blondies

I consider myself a connoisseur of baked goods and my favorite bakery on the planet is The Sweet Tooth Fairy. Yesterday I stopped by for a cupcake (okay, two) and discovered their BLONDIES: Like a S'more on steroids! Let's just say I may have a new addiction.

In an act of SERENDIPITY, I discovered that said Blondies fit perfectly into the new Decorative Window Gift Boxes from the Stampin' Up! Holiday Catalog (6 boxes for $4.95...a bargain!):

Side Note: I bought four blondies to share with the ladies I visit in my church calling each month...only three blondies made it to the boxes...

Add a strip of Designer Series Paper, a skull stamp (so they can tell their kids it's poison and won't have to share) and some washi tape and abracadabra! You've got yourself a VERY quick gift. IF you can deliver them before you eat them all.

Project Recipe (for the boxes, not the blondies)
All supplies can be ordered from my Stampin' Up! Store

Stamps: Toil & Trouble (2013 Holiday Catalog)
Ink: Staz-On White (Item 106960)
Paper: Witches Brew DSP (132185)
Embellishments: Witches Brew Designer Washi Tape (132156)
Other: Blondies from The Sweet Tooth Fairy!

post signature

Friday, October 11, 2013

5 Ways on Fridays: Envelope Punch Board


Today I'm sharing FIVE amazing ways to use the new Envelope Punch Board from Stampin' Up! (Item #133774). Once you see these, you'll NEED your own and you can order it from My Stampin; Up! Store Since it's Halloween season, I made most of my samples using the Witches Brew Designer Series Paper (132185), Toil & Trouble and Tags 4 You stamp sets (Holiday Catalog) and Label Bracket punch (132153)

1. Make Envelopes. Stating the painfully obvious, but hey...that's what it was made for! Just remember this: Envelopes don't always have to hold just a card :)

If you haven't seen how the Envelope Punch Board works, WATCH the Training Video from Stampin' Up! I also love having a liner inside the envelope and the best video tutorial I've seen (using just a small square of Designer Series Paper) is from Mary Fish and her tutorial can be seen HERE. 

2. File Folder Cards. These unique cards are so much fun to make and you could create a whole slew of little file folders to organize things like photos, paper embellishments, receipts, etc.
Patty Bennett's Video Tutorial explains how simple these are, and once you've made a few, you just can't stop! 

3. Boxes. Yep, that's right: The Envelope Punch Board can make BOXES! Here are two of my top picks (because they are both simple, and I'm all about easy!)
Elaine Schader (at Elaine's Creations) made this box to hold some eerily adorable Halloween tags from four envelopes made with the Punch Board. Check it out on HER BLOG.

Designed to hold 4 cards & envelopes, I discovered (after I whipped this one out in no time flat) that this little gem also holds a King Size Kit Kat! I followed the instructions by Cindy Beach at Stamp, Paper and Ink. The only modification I made was to use my Word Window punch to create a place to insert the top flap and hold it closed.

Learn to make another candy bar box on THIS video tutorial by Janet Wakeland

4. Advent Calendar. When I saw this on the Stampin' Up! blog post  (scroll down past the Game Day banner to see the instructions and downloadable PDF for dates) I thought it was GENIUS!

5. Envelope Tag Book. Here's one for the memory keepers...or this could be a fun way to present love coupons, a grandma brag book or just for fun.

Tricia over at the Efficient Crafter is the artist for this project and her motto, "Quick...Let's Craft!" tells me she's my kind of lady! View her tutorial HERE. 
------------------------------------------------------

So there you have FIVE different ways to use the new Envelope Punch Board! It's a MUST HAVE tool for your Craft Closet and you can order it in Loni's Stampin' Store today. If you have another great way to use the EPB, leave a comment below to help compile a resource for more excellent ideas!

post signature

Wednesday, September 4, 2013

September Stamp Soiree: St. George, Utah


Get your fingers inky, Southern Utah! Come get crafty for the holidays on Saturday, September 28th at the clubhouse on Lion's Head Drive in Washington (near Green Springs Golf Course). We have TWO fun events you won't want to miss~together we are calling it a "Stampin' Soiree"~and I'm sharing a few samples!

Card Buffet (10 a.m.): Create 8 gorgeous greeting cards (2 each of birthday and thank you and 4 christmas) Bring your scissors and adhesive, everything else is provided for you, including envelopes. Cost: $15


Holiday Stamp Camp (1:30 p.m.):  Make a Halloween Sampler to frame as well as Christmas boxes, bags and tags for dressing up the perfect gift! As always, bring scissors and adhesives. Cost: $25

BEST VALUE: Attend BOTH events for just $35 (save $5). You can leave for lunch or stay and visit over a Durango's Salad (optional). 

REGISTER BY SEPTEMBER 23rd by selecting Paypal Options below or call me at 801.376.8685 to register by phone! It's going to be a fun day of papercrafting nirvana!
Stamp Soiree Options

Monday, March 18, 2013

A Happy Hello/Goodbye Sale-a-Bration

5 days left of Sale-a-Bration and I've had fun demonstrating these boxes at my March parties from the Happy Hello Card Kit:
The instructions for the boxes are on Barb's website HERE...and my only change/suggestion to make it easier is to put your card on the Simply Scored with the flat side flush against the left side and score at 1", then flip the card over so the other flat edge is flush against the left side and score again at 1". Turn the card so the blue chevrons are on the left edge and score down the edge of the pattern at 3".

I used a clear envelope with the sticky flap cut off for the "bag" inside the box and filled it with chocolate, my favorite treat.

They are really fun to make, but since the kit comes with 8 cards and envelopes (and everything else to make these cards)...
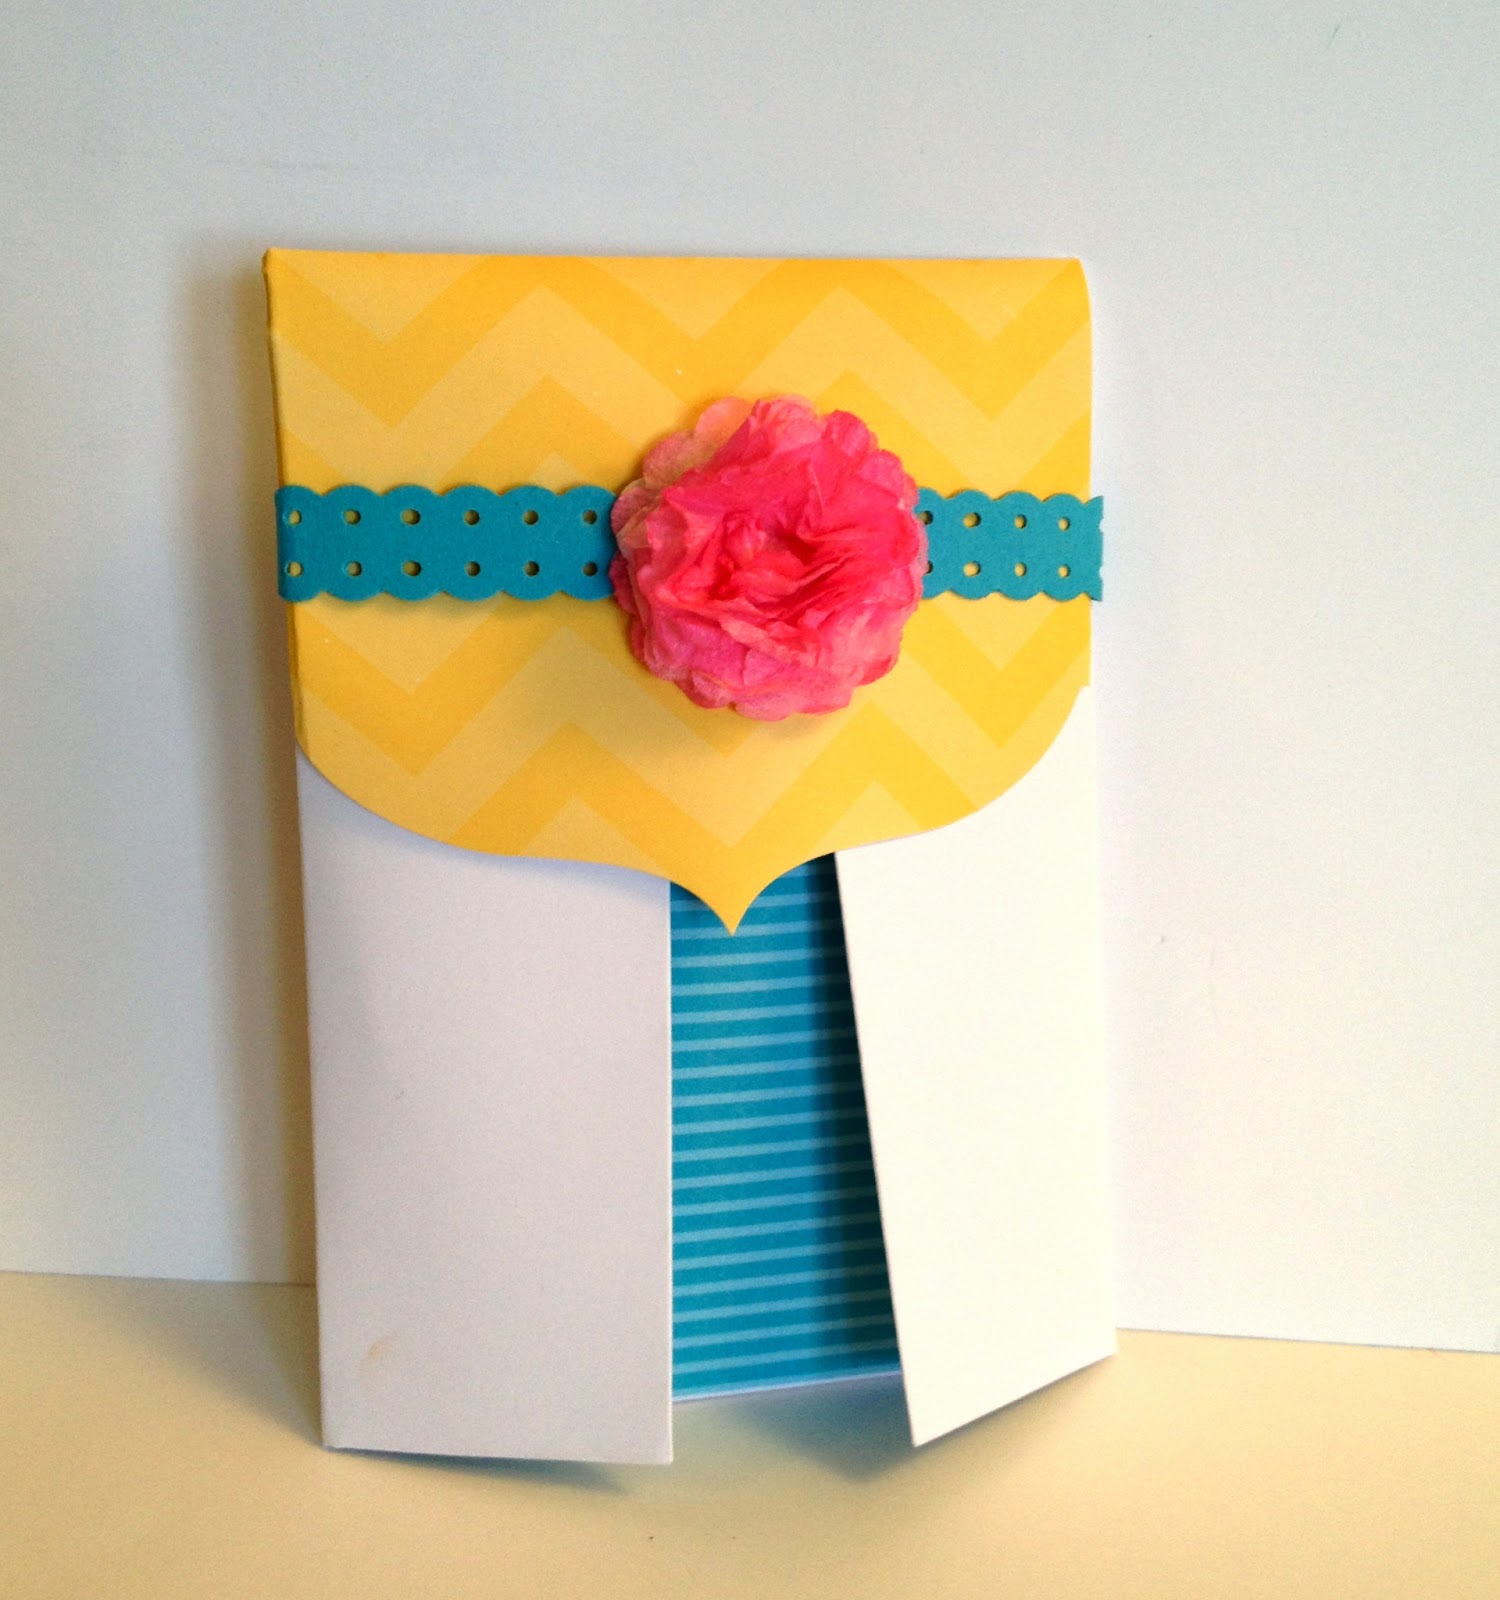
...I had a lot of these cute envelopes left over! What to do with them?? So I came up with this:
It's a gift card holder!
Here are the simple steps to make your own:

1. Cut white card stock 2-3/4" x 9-3/4". Score at 1-7/8" and 5-7/8" on the Simply Scored Tool (122334).  Punch a half circle (I used the 1-3/8" punch) on the smaller flap edge and the Scallop Trim Border punch (118402) on the larger side edge. Adhere sticky strip to the very edge of the smaller flap sides.
2. On the opposite side of the card stock, stamp your image. NOTE: This image is from the Carry On set which is only available when you host a party and will be retired at the end of May...call me today to schedule a private class :)
3. Remove red from sticky strip and fold in to create pocket. Add a small strip of colored card stock under the decorative edge and mount the pocket to a 4-1/4" x 3" piece of card stock.
4. Take the envelope from the Happy Hello Sale-a-Bration card kit and score at 1-3/8" and 4-1/2" using the Simply Scored.
5. Insert a 3-3/4" x 3" piece of Designer Series Paper into the scored envelope and mark with pen so you know where to trim:
6. Remove the DSP, trim and adhere to center front section of envelope. Trim into the envelope flap along score lines, fold and adhere to sides (or remove). Insert card into envelope.
7. Punch 8 layers of Creped Filter Paper (129393) using 1-1/4" scallop circle punch (127811) and push brad through the center of all circles. Scrunch each layer up to form flower. Spray flower with Stampin' Spritzer (126185) filled with rubbing alcohol and 4 drops of re-inker (I used Melon Mambo). Create a belly band with the Dotted Scallop Ribbon Border punch (119275) and insert flower brad to secure in the front.
Voila! A beautiful way to present a gift card AND use up those gorgeous envelopes from the Happy Hello Card Kit from Sale-a-Bration!
to purchase the items used in this tutorial and get the Happy Hello Card Kit FREE when you spend $50...but hurry! It's only available through Friday, March 22nd when we must say GOOD-BYE to Sale-a-Bration 2013 :(
post signature

Monday, December 20, 2010

"Recycle" Christmas Cards: How To Make Boxes!

Obviously, I love to keep hand-crafted cards to remember and inspire me, but what do I do with all the "other" cards I get at Christmas time? I re-purpose them into gift boxes!
Here is how to do it in 8 easy steps:
  1. Cut card in half along fold.
  2. Using back half of card first, fold so long edges meet in middle (important to do this step first)
  3. Open and fold short edges to meet in the middle.
  4. Open and cut edges from short edges to the first fold.
  5. Fold short "arms" into the inside of box.
  6. Fold top edges of larger tab over the short arms and tape down to inside of box. This creates the BOTTOM of the box.
  7. Repeat steps 1-6 for the TOP of the box using the front half of card, leaving a small space between edges when folding (this makes the top a bit bigger to fit over the bottom). Remember to keep the pretty side facing OUT when folding the box, so you can see the design!
  8. Fit box together, place gift inside and add ribbon!