The instructions for the boxes are on Barb's website HERE...and my only change/suggestion to make it easier is to put your card on the Simply Scored with the flat side flush against the left side and score at 1", then flip the card over so the other flat edge is flush against the left side and score again at 1". Turn the card so the blue chevrons are on the left edge and score down the edge of the pattern at 3".
I used a clear envelope with the sticky flap cut off for the "bag" inside the box and filled it with chocolate, my favorite treat.
They are really fun to make, but since the kit comes with 8 cards and envelopes (and everything else to make these cards)...
...I had a lot of these cute envelopes left over! What to do with them?? So I came up with this:
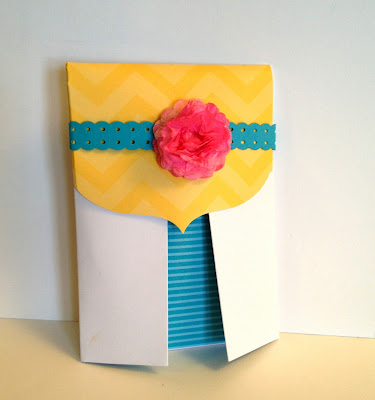
It's a gift card holder!Here are the simple steps to make your own:
1. Cut white card stock 2-3/4" x 9-3/4". Score at 1-7/8" and 5-7/8" on the Simply Scored Tool (122334). Punch a half circle (I used the 1-3/8" punch) on the smaller flap edge and the Scallop Trim Border punch (118402) on the larger side edge. Adhere sticky strip to the very edge of the smaller flap sides.
2. On the opposite side of the card stock, stamp your image. NOTE: This image is from the Carry On set which is only available when you host a party and will be retired at the end of May...call me today to schedule a private class :)
3. Remove red from sticky strip and fold in to create pocket. Add a small strip of colored card stock under the decorative edge and mount the pocket to a 4-1/4" x 3" piece of card stock.
4. Take the envelope from the Happy Hello Sale-a-Bration card kit and score at 1-3/8" and 4-1/2" using the Simply Scored.
5. Insert a 3-3/4" x 3" piece of Designer Series Paper into the scored envelope and mark with pen so you know where to trim:
7. Punch 8 layers of Creped Filter Paper (129393) using 1-1/4" scallop circle punch (127811) and push brad through the center of all circles. Scrunch each layer up to form flower. Spray flower with Stampin' Spritzer (126185) filled with rubbing alcohol and 4 drops of re-inker (I used Melon Mambo). Create a belly band with the Dotted Scallop Ribbon Border punch (119275) and insert flower brad to secure in the front.
Voila! A beautiful way to present a gift card AND use up those gorgeous envelopes from the Happy Hello Card Kit from Sale-a-Bration!
VISIT MY STAMPIN' STORE
to purchase the items used in this tutorial and get the Happy Hello Card Kit FREE when you spend $50...but hurry! It's only available through Friday, March 22nd when we must say GOOD-BYE to Sale-a-Bration 2013 :(


No comments:
Post a Comment